Lighting Like Rembrandt: How to Create Dramatic Lighting Through Cinematic Chiaroscuro
Rembrandt Lighting often refers to using one bright light to depict stark contrasts between light and dark. This adds 3-dimensional depth on a 2D surface like other lighting techniques, but the high illumination contrast is also one of the best techniques for creating dramatic tension.
Cinematography is often referred to as painting with light, and like painting, many lighting techniques are influenced by the old Masters. Compositions of the old Masters often employ light to create drama. Chiaroscuro, which is Italian for “light-dark”, was the primary technique to create drama, used by such luminaries as Leonardo, Correggio, and Caravaggio. But it was the Dutch painter, Rembrandt who was its master.
In cinematography, the technique is known as Rembrandt Lighting in homage to the master of light and shadow. This video by Film Lab explains how Rembrandt Lighting works, and how to light your subject in a studio setting. It also gives you some tips on how to set-up Rembrandt Lighting outside on location.
Rembrandt’s works are characterized by faces that are lit by a strong soft light mostly from one side. One side of the face is light, while the other is contrasted in deep shadows. Very little fill light is used. Instead, the dark side of the face is partially merged with the background. He would often add a slight glow to the background or make it lighter to help distinguish the face from the background.
It’s a technique that gives Rembrandt’s work a beautiful contrast between light and dark.
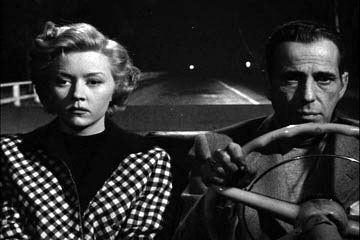
So, it’s no surprise that this technique would become a popular lighting technique used in film. It was a central technique in establishing the look of 1940’s film noir.
Determine the Mood
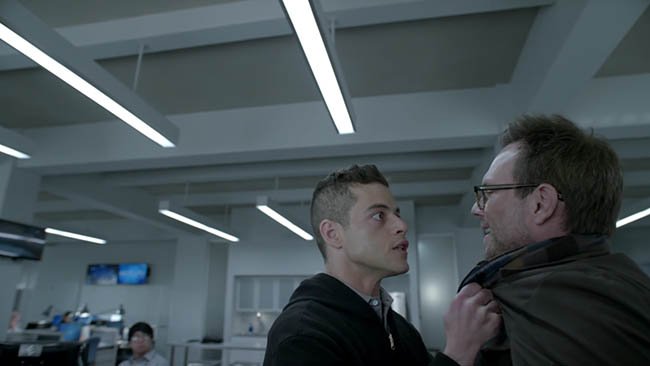
Rembrandt lighting automatically sets the mood. The stark contrast between light and dark is unambiguous in the depiction of the dark, seedy, and mysterious. Perfect for film noir. This is why you’ll often find it used for scenes set in prisons, dungeons, or hideouts. Classic films, such as Citizen Kane, The Godfather, Fight Club, and Seven, are made more memorable -and hard-boiled- by an almost heavy-handed use of the technique.
The Light Set-Up
The video above uses two lights in the studio set-up, but Rembrandt lighting is often used with one light source and a reflector. The main light source (key light) is placed about 45-degrees offset from your subject. It should be a bit higher than eye-level, lighting the side of the face farthest from the camera.
This can be augmented by the use of a reflector or second light placed at 45-degrees, off to the side to produce a dark shadow on one side of the face.
If you use a second light (fill light) in place of a reflector you will need to use diffusion and neutral gels to reduce the intensity of the fill light. Otherwise, the fill light will negate the depth created by the key light.
For outside shots, you can use the sun as the key light and a reflector.
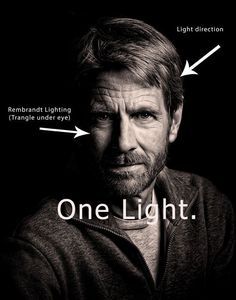
Rembrandt Lighting is characterized by a triangle of light underneath one of the subject’s eyes on the shadowed side of the face. This triangle is no wider than the eye and no longer than the nose. These shadows aid in modeling.
Move the Light Source Around
Having said all that, you change the height and angle of the light source to communicate different emotions such as loneliness, mystery, or a sense of dread. This may screw with creating the perfect triangle under the eye, BUT once you become familiar with the “rules” of chiaroscuro -you can break them.